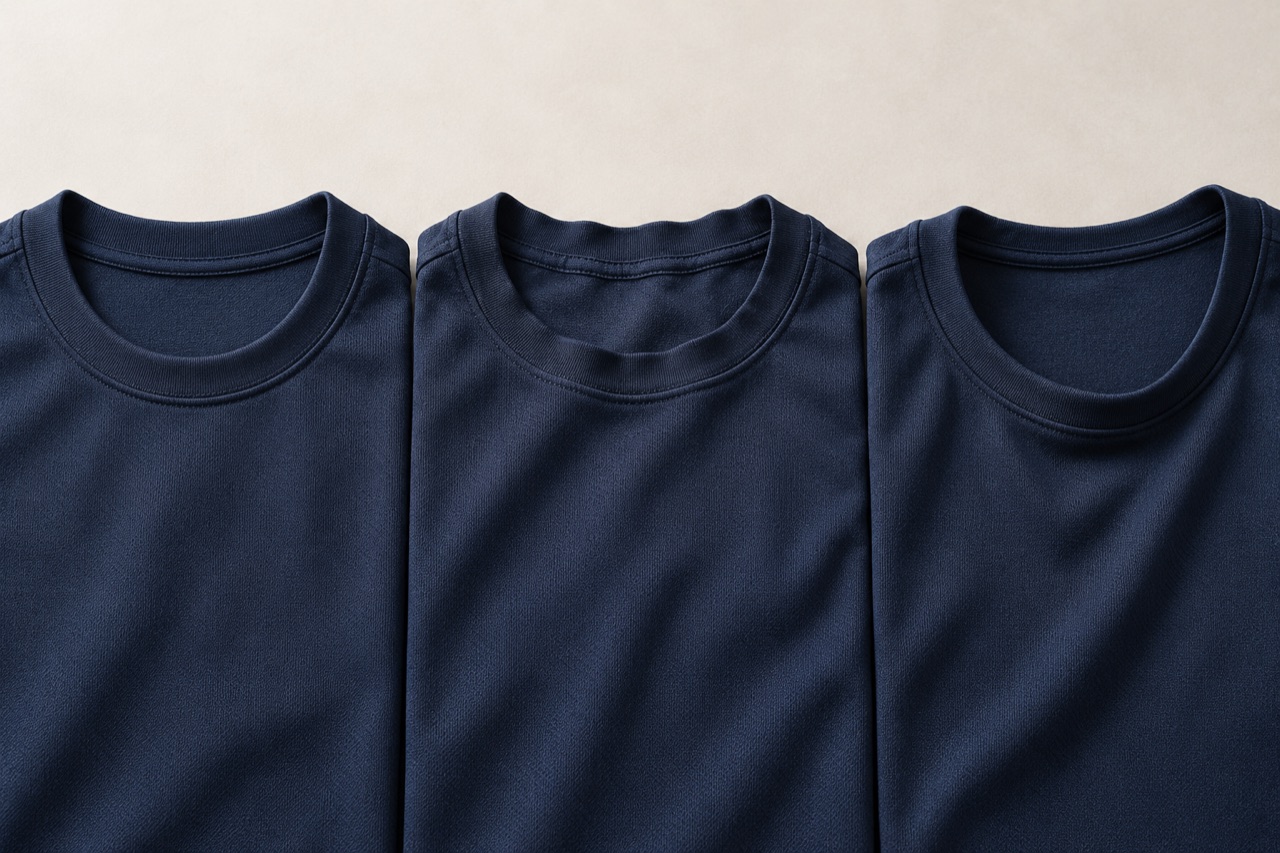
A neckline occupies a small part of a jersey, but it frames the whole garment. When it stands away from the body, ripples around the edge or changes after washing, the shirt can look unfinished even if the main panels are well made.
The quickest route to a useful correction is to describe the defect more precisely. A wide opening, a wavy attachment seam and a band that fails to recover are not the same observation.
Start with the shape, then inspect the seam
Lay the garment flat without pulling it into a better shape. Compare the front and back neckline, the band width and the left and right sides. Then inspect the worn garment. A neckline can lie neatly on a table yet sit differently on the body.
| Observation | Development question |
|---|---|
| The opening is consistently too wide | Does the pattern match the intended neckline shape and wearer? |
| Waves follow the attachment seam | How were the band and body fed, tensioned and joined? |
| The band remains enlarged after use | How does this material recover, and what happened during wear and care? |
| Distortion appears after washing | How do the assembled components change under the specified care process? |
A neckband needs its own development
Choosing a rib that matches the shirt colour is only the visual part of the job. The band also needs to open sufficiently for dressing, feel acceptable at the neck and return toward its intended shape. Its behaviour must be judged with the body fabric and neckline geometry.
There is no single neckband percentage that should be copied across every jersey. Treat band length and width as development variables, then compare controlled samples. Record the materials and construction used so a successful sample can be reproduced.
Sewing can preserve distortion
Coats identifies several contributors to seam puckering, including thread tension, uneven feeding and different dimensional changes in assembled materials. Pulling one layer more than the other while sewing can leave distortion held within the seam. A wavy collar therefore deserves an assembly review rather than an immediate change to fabric weight. Coats: Eliminating Seam Puckering.
Ask the sample room to change one factor at a time. Keep the same pattern while investigating sewing, or keep the assembly method consistent while comparing band materials. Changing the rib, band length, stitch settings and pattern together may produce a better sample without revealing which change mattered.
Examine the joins and finishing details
Turn the collar over and check the point where the band closes, the shoulder intersections and any neck tape. Inspect for uneven band width, concentrated bulk and visible twisting. These locations can be easy to miss when approval is based only on a front photograph.
Additional topstitching should be evaluated as part of the design, not used automatically to force an unstable collar flat. Check the complete assembly for comfortable stretch and appearance.
Describe the neckline before calling it stretched
“Stretched collar” is a convenient phrase, but it can describe several different appearances. The opening may be larger than intended from the start. The edge may ripple while the overall opening remains the correct size. The band may stand away from the body at one point, twist through its width or remain enlarged after dressing. Each observation suggests a different development question.
Begin with the garment in a relaxed state on a flat surface. Do not pull the shoulder seams into position or smooth the band so aggressively that the distortion disappears. Photograph the front, back and any local irregularity. Then inspect the garment on the intended wearer, because a flat presentation cannot establish how the neckline sits around a body.
Record when the change appeared. Was it visible on the first sample, after dressing, after a wear session or after laundering? If there is no reliable starting photograph, preserve that uncertainty. A later image alone cannot establish whether the collar changed in use or was always cut and assembled that way.
This description helps avoid a common unproductive response: choosing a thicker rib without identifying the problem. A heavier-looking band might change the appearance, but it does not automatically correct pattern geometry, assembly distortion or recovery. The first improvement is a precise observation that the sample room can reproduce and investigate.
The body opening and the neckband work as a pair
A crew neckline is an assembly of a shaped body opening and a band intended to sit around it. Their relationship matters more than either dimension in isolation. The opening’s front depth, back shape and width across the shoulders influence the visual result. The band’s length and finished width influence how that result is presented and how the wearer experiences it.
Evaluate the intended silhouette before adjusting the assembly. Is the style meant to sit close to the neck or have a more open casual shape? Does the wearer need additional clearance for dressing? A band that looks loose against a close-neck reference may be appropriate for another design. The product brief should establish the intended shape rather than rely on the word standard.
When comparing prototypes, keep the pattern version visible in the record. If the body opening changes at the same time as the band, the result cannot be attributed to band length alone. There is nothing wrong with changing both when needed, but the team should know what changed and why.
Review the front and back together. A neckline can appear balanced from the front while sitting awkwardly behind the neck or near the shoulder intersections. The successful sample is the complete garment on the body, with the intended movement and dressing behaviour, rather than one attractive front photograph.
Rib, self-fabric and other bands need separate evaluation
The visual label for a neckband does not establish its behaviour. A rib, a strip of body fabric and another knitted trim can differ in hand feel, extension and recovery. Even two ribs that look similar may not behave identically. Use the actual material reference in development rather than assuming one familiar appearance guarantees the same result.
Handle the candidate band and body fabric together. Observe how each responds to gentle extension in the relevant direction, then how it returns toward its starting form. This informal comparison can identify questions for further assessment, but it is not a quantified recovery test. If the specification needs a measured property, obtain it through an appropriate method.
Colour matching should be reviewed alongside the physical behaviour. A visually perfect trim is not a complete solution if it produces an unsatisfactory opening or contact feel. Conversely, a material that behaves well still needs to meet the design’s colour and surface expectations. Keep those approval decisions distinct so one attractive feature does not obscure another weakness.
Retain enough of the actual band material to reproduce the sample. A successful collar made from an unidentified remnant is difficult to repeat. The useful record connects material identity, cutting direction, band dimensions and assembly to the finished result. That relationship is more dependable than the broad instruction to use a good quality rib.
Why a universal neckband ratio is unreliable
Simple sewing advice often expresses band length as a percentage of the body opening. That can be a practical starting point within a known construction, but it should not be treated as a universal production rule. Different materials, band widths, opening shapes and intended fits need their own development.
Define what is being measured before comparing ratios. The cut band length, the joined band length and the finished visible circumference are not interchangeable descriptions. Seam allowances and the point at which a measurement is taken also matter. Two people can quote different percentages while referring to different dimensions of the same sample.
Use controlled prototypes to explore the relationship. Keep the body pattern, band material and assembly method consistent while changing the intended band dimension. Label each version. Compare the flat appearance, worn shape and dressing experience, then review the samples after the agreed care procedure. This gives the development team evidence about that actual combination.
Do not reduce the decision to whichever version lies flattest on the table. A band can look tidy yet feel too restrictive when the garment is put on. Another may be comfortable but fail the intended silhouette. The preferred relationship is the one that satisfies the complete brief, with dimensions that are recorded clearly enough to reproduce across the relevant sizes.
Feeding and tension can change an otherwise sound design
Once the pattern and materials are plausible, assembly deserves its own review. Coats’ seam-puckering guidance identifies uneven feeding and tension-related effects among the mechanisms that can distort a seam. For a neckline, that means a wave should not automatically be interpreted as evidence that the band material is wrong.
Ask the sample room to compare how the components are being presented and joined. Are reference points matched consistently? Is one section being handled differently from another? Does the distortion repeat at the same point around the opening? These observations help the technician decide what to examine without prescribing a machine adjustment from a photograph.
Compare more than one sample where a handling inconsistency is suspected. One especially neat prototype does not establish that the construction is repeatable. Equally, one distorted piece does not prove the entire pattern is unsuitable. A small controlled comparison can distinguish an isolated assembly variation from a persistent design problem.
Keep machine and process changes traceable. If the technician adjusts feeding or tension, label the resulting sample and preserve the previous one. Then inspect the whole collar, including its extension and recovery in use. A correction that removes waves but creates a restrictive or uncomfortable seam has moved the problem rather than completed the development.
Band width changes the visual and physical balance
The finished width of the neckband affects how strongly the collar frames the garment. A narrow band may suit a light, understated design; a wider band may be central to a retro or more substantial look. Neither width is inherently better. The question is whether the chosen material and geometry support the intended appearance.
Measure the visible width consistently around the opening. Local differences can become obvious even when the overall circumference is acceptable. Inspect the front centre, shoulder areas and back, noting whether the band rolls, twists or changes width. Avoid correcting the photograph by manually flattening each area before the record is taken.
Review any topstitching as part of the same assembly. Its position and appearance influence the finished edge, and the complete seam must still allow appropriate movement. Additional stitching should not be used as an unexplained cosmetic fix for a collar whose underlying relationship has not been developed.
If changing width, make a new physical sample rather than assuming the previous band length remains suitable. The visual balance and wearing behaviour may change together. Keep the revised dimensions connected to the material and pattern version. This is particularly important when a design moves from an adult reference into junior sizes, where the same nominal width can occupy a different proportion of the garment.
Neck tape and labels are part of the collar system
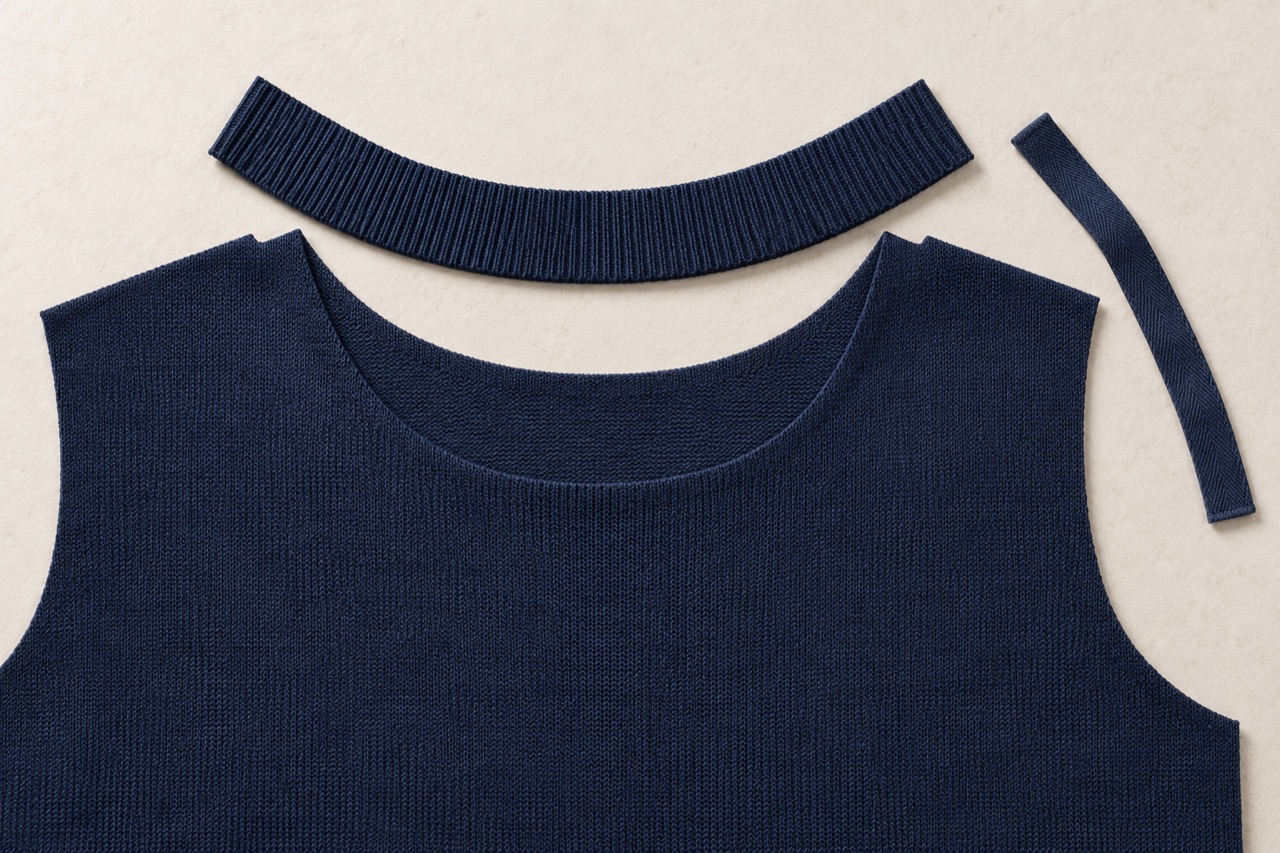
Turn the garment inside out and follow the neckline with your eyes and fingertips. The visible band is only one component. Neck tape, labels, seam allowances and the band-closing join can create local changes in thickness or stiffness. A collar that looks neat from the outside may still have a noticeable contact point inside.
Inspect where the tape begins and ends, how its edges are finished and how it passes through shoulder intersections. Check whether the tape sits smoothly without pulling the surrounding area into an unintended shape. The exact construction should be judged against the design and material, rather than copied from an unrelated garment because it looks familiar.
Labels deserve the same attention. Their placement may affect contact at the back neck, and their attachment can add another local layer. If the wearer identifies discomfort there, inspect the label and its surrounding seam before blaming the entire band fabric. A targeted change may solve the specific issue more cleanly.
Record these internal details in the approved sample photographs. They are easy to omit from a product brief focused on front and back exterior views. Yet they can determine whether a later sample genuinely matches the original construction. The collar system is complete only when both its visible outline and its internal contact surfaces have been considered.
Stretch for dressing and shape retention are different questions
A neckline needs to accommodate dressing, but the ability to open temporarily does not by itself show that it will return satisfactorily afterward. Observe both stages. How does the garment pass over the head in normal use? How does the band sit once the shirt has been put on and allowed to settle?
Use relevant wearers and garment sizes rather than stretching the opening by hand to an arbitrary extreme. A dramatic stretch demonstration may say little about dressing comfort. Record any difficulty, local restriction or lasting change in shape. If a specific extension or recovery requirement is necessary, use an appropriate technical assessment in addition to the practical fitting review.
Consider the entire opening, including the attachment seam and internal finishing. A stretchable band can be paired with an assembly that does not behave as intended. Conversely, a generous opening may be easy to put on but fail the required silhouette. The product must balance those requirements rather than maximise one at the expense of the other.
When comparing revisions, use the same observation sequence and relaxation period. Otherwise, one sample may be judged immediately after dressing and another after it has had time to settle. Clear timing helps distinguish temporary displacement from a persistent appearance change without inventing a universal recovery threshold.
Washing can reveal component relationships
If distortion appears after care, compare the whole assembly before deciding which component is responsible. The band, body, sewing thread and internal finishing are joined together. A change in the relationship among them can become visible around the neckline even when each component looked satisfactory before assembly.
Establish the starting measurements and photographs using an agreed method. After the specified care sequence, allow the garment to reach the agreed dry and relaxed condition before measuring again. Use the same surface, reference points and handling. Pulling the collar into shape before the second measurement can conceal the very change under investigation.
Record both dimensions and appearance. A small dimensional change may be visually important at one location, while a larger change elsewhere may be less noticeable. A measurement alone cannot describe twisting, uneven width or a local standing edge. The two forms of evidence should support each other.
Avoid using an unrecorded pressing step to make the post-care sample look acceptable. If finishing is part of the intended care or production process, document it. If it is an attempted correction, keep that separate. The aim is to understand how the garment behaves under its intended instructions, not to produce a flattering after photograph at any cost.
A worked example: waves appear only near one shoulder
Imagine a crew-neck training shirt whose band looks smooth around most of the opening but forms waves near the right shoulder. The overall opening is comfortable, and the left side looks satisfactory. This is an illustrative development problem, not a reported production case. The local pattern is the most useful clue to the next review.
Start by comparing reference-point matching, band width and the internal junction on both sides. Examine whether the same asymmetry appears in other samples made to the same pattern. If the issue is inconsistent between pieces, assembly handling deserves close attention. If it repeats consistently, review the geometry and component relationship as well.
Keep the body pattern and materials unchanged for an initial controlled assembly comparison where appropriate. If that resolves the local wave, repeat the result and review it after care. If it does not, move to a separately identified design change. This sequence makes the learning easier to interpret than replacing the rib, shortening the band and moving the shoulder seam simultaneously.
The final review should still include the worn neckline and dressing behaviour. A smooth shoulder area is progress, but the complete collar must remain comfortable and balanced. The practical value lies in identifying a repeatable construction that addresses the observed defect, not merely finding one sample that photographs well.
Can pressing solve a wavy neckline?
Pressing may change how a sample presents, but appearance immediately afterward does not establish a lasting construction correction. Record the finishing step, then review the garment under its intended use and care conditions. A development decision should explain why the neckline remains acceptable, rather than depend on repeated unrecorded reshaping before inspection.
Preserve the construction that produced the approved shape
Keep the complete approved garment together with the pattern version, band material and dimensions, relevant cutting information and internal finishing details. Include photographs of the front, back, band join and shoulder intersections. These records make the approval useful to someone who was not present during sampling.
Specify measurement points clearly. A neckline width, a front drop and a band width should each have an agreed method, including how the garment is laid out. Where tolerances are needed, establish them through the project’s technical process rather than borrowing numbers from an unrelated style.
Finally, state which conditions have been reviewed: initial appearance, dressing, wear and the documented care sequence. A tidy sample is valuable, but a tidy sample with a reproducible construction record is much more valuable. It connects the intended collar shape to the materials and assembly that actually achieved it.
Compare after relaxation and care
Photograph and measure the agreed neckline points before use and after the specified care and relaxation procedure. Use the same lay-flat method and avoid stretching the garment while measuring. Inspect the worn shape again as well as the dimensions.
A home attempt to shrink or re-press a loose collar does not establish the production remedy. For development, retain the best-performing complete sample and its construction record. A successful neckline needs the right shape, material recovery and assembly to work together.
Technical references and question evidence
- TechnicalCoats: Eliminating Seam Puckering
- Technical contextCottonWorks: Single and Double Knits
- Question evidence onlySoccer jersey collar fit concern
- Question evidence onlyStretched jersey collar after washing
Technical references support the discussion method. Question evidence documents public discussion of an issue; it does not diagnose a KITOEM product or establish a test result.